- by Amanda "Mandifesto" Orneck
- Posted on September 19, 2013 @ 9:00 PST

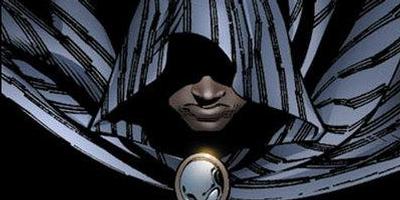
It's been one week since World of Warcraft players stepped onto the Timeless Isle, eager to plunder its riches and learn its secrets. But what if you never got around to finishing that legendary questline, and do not have a cloak yet? It means you can't find the biggest baddy on the island, and don't have access to the newest quests in the story of a certain halfbreed prince -- and no, I don't mean that one.
We'll you're not alone: I, too am behind on the grind. Now that my lack of cloak is keeping me from lore, I have been speeding along as fast as I can, and it's only fair that I share what I've discovered along the way. What follows is a living document, meaning that as I complete the stages of the questline I will update this guide. That also means that if you have a clever trick to share with your fellow players, be sure to let us know in the comments. It might make it into the guide.
It's important to note that I am going to do my best to keep this spoiler free, but as this is a lore questline, there might be points where the instructions might lead into spoilerific waters. Hopefully I can keep the splash damage to a minimum, but I cannot guarantee your safety. Read on at your own risk.
Stage One: The Fresh Prince of the Veiled Stair
The first step in getting on the Legendary Cloak track is to hit 90. I know it seems obvious, but since the quest chain is not available before then, I'm going to send you off to go grab you some levels. Head to a major city and look for a quest called Stranger in a Strange Land. From here you're going to need to head to the Tavern in the Mists and talk to Wrathion. Over drinks he'll tell you some interesting stuff, so pay attention if you're at all interested in lore: This is where we get hints at what the next expansion might hold. From here he'll send you on your merry way with instructions to prove your worth. You do this by killing a lot of mobs and gathering items from the first three raids in Mists of Pandaria.
You're going to have to get honored with The Black Prince, and to do so you have to slaughter untold amounts of Mogu and Mantid. This is where starting the quest line late is actually a good thing. You have two options here: Head to the Timeless Isle and grab some quick ilvl 496 gear pieces, or dive right into the rep grind.
Tip 1: Get yer free gearz
I recommend taking the couple hours to gear up first. The Timeless Isle should be called Viva Loot Pinata: It's a joyous place where purple items can be found everywhere. Check every chest you find, battle the mobs on the island, and keep an eye out for rare monsters. If you want to start up the Emperor Shaohao quests as well to maximize your time, you can, but as those will eventually require the Legendary Cloak, I suggest not getting too distracted by them.
Tip 2: Kill you some Mogu
Whether or not you choose to grab your free gear or not is up to you, but when you are ready to rep grind there's only one place to go: Vale of Eternal Blossoms. Why do I say this? Because the place has been ravaged by the events at the beginning of Patch 5.4. This is a bad thing for the Golden Lotus, but an excellent thing for you, as the place is crawling with rare mobs. These mobs spawn at a pretty steady pace, and are pretty easy to beat, especially if you're wearing your shiny new Timeless gear. At 200 rep a pop you will quickly pound your way through to honored, and get a decent amount of greens for melting or auctioning, blues to sell for repair costs, and rare cooking ingredients. You will also get reputation with the Golden Lotus for these kills. There used to be Golden Lotus dailies, but as you will see, they are no longer available because, carnage.
The second option is to head to the Dread Wastes and mow down a lot of Mantid. The advantage here is that while you get much less reputation per kill (each mob is about 11 rep), you can also do your Klaxxi dailies. Unfortunately there are only a handful of these a day (between 3 and 8 if I recall correctly) so it's not like you can really power through both factions at the same time. It's for this reason that I suggest the Mogu grind over the Mantid, but that's your call. Granted, you can also do a combo of both if you don't mind bouncing around the map a bit.
Tip 3: Raid while you grind
Unfortunately there's no real way to get around the fact that a rep grind takes time. Luckily Wrathion gave you a second quest along with his request for reputation, and so you can double up on your questage by queuing up for LFR versions of Mogu'shan Vaults, Heart of Fear, and Terrace of Endless Spring. You can also get the Sigils you need from the new Siege of Orgrimmar raid, but in order to do so you'll need ilvl 502 gear, so see tip one above.
I've had pretty good luck with the drop rates on the Sigils of Wisdom and Sigils of Power, which leads me to believe Patch 5.4 upgraded the drop rates to speed up the process for those of us trying to catch up. The first week of the patch I got 10/20, and am just about to get the rest I need during the second week, so I'm going to go out on a limb and say that it takes two weeks to complete this quest.
Turning in these two quests will progress you on to Chapter Two of the Legendary Questline. We'll continue this guide as soon as I reach the next stage myself. Until then, happy grinding!
Stage Two: Grindhouse, Valor Edition
At this point, you have the rhythm down. You know that you will be interacting with the content patches, each in turn, performing massive feats for Wrathion's amusement. Presumably these errands prove something, but really it is just a time sink. This stage unfortunately is a fixed time sink, and will take you a minimum of three weeks.On the plus side, there's another benefit to waiting until after Patch 5.4 to start this Quest Chain: Originally this Chapter took a minimum of six weeks, and the tasks within were designed for raids, not groups. This chapter of the questline coincides with Patch 5.1: Landfall, so ge ready to get your faux PvP on. Chat up the Black Prince, and receive two new quests, A Test of Valor and The Prince's Pursuit.
Tip 1: Double your faction, double your fun
If you're like me, you skipped a lot of this content because it was a grind fest, which means you get the chance to up your Operation Shieldwall or Dominance Offensive faction rep going. You won't exactly have time to max it out, but you can certainly get on your way toward Honored by the time you're done with these quests. So you have a question to ask yourself: Have you started any of the Landfall content? If you haven't, you need to head to Vale of Eternal Blossoms and accept the auto quest to Meet the Scout. You might even have this in your quest log already, so have a looksy. Then head to Krasarang Wilds and start your faction's version of the Landfall content. Your going to need to get to the point where you are given daily quests, which shouldn't take too long.
Tip 2: Fight tougher guys
Once you reach the Landfall daily quests, grab them, then head out into the Wilds and grind you some faction. Standard foes will net you about 27 faction, the Heroes of the opposite faction are worth 55 points, and the "rare" (which are always there) elites are worth 440. This means that you can quickly chew through to revered with The Black Prince in just a few hours, depending on your class. I am playing a hunter, so spent most of my time mowing down the rares since they are worth so much reputation. I didn't time my grind (my brain tends to melt out my ears while grinding, so I did my best to ignore that I was just running around killing guys), but it seemed to only take a few hours. None of these fights will be super challenging, especially because you're wearing at least ilvl 496 gear from the Timeless Isle, and probably a couple items from the LFR runs we did in the previous stage.
You also have the option of spreading this grind across the three weeks this Chapter will take. If you do, that means you can do Landfall dailies each day to maximize your faction grind efficiency. I couldn't get myself to do this, since I needed to have the grind completed as fast as possible, but if you do, you probably could be near revered or further by the end of the three weeks.
Tip 3: Upgrade yer gearz
You're probably wondering why I keep mentioning the three week timeframe for Chapter 2, and that is because of the second quest that you're given, A Test of Valor, requires you to collect 3000 Valor points. If you open up your currency window, you'll see we are still bound to a 1000 valor point weekly cap, so we will have a minimum of three weeks to fix the quota. If you want to get through this stage of the questline as fast as possible, you're going to have to spend a lot of time collecting Valor
"But what if I already have my Valor points maxed?" you ask (I know, I asked that myself). You're going to have to dump them because Wrathion wants you to get him a set of freshly earned valor points -- no stale valor will do. I recommend heading to the Vale of Eternal Blossoms and sinking your points into gear upgrades for any of the gear you got raiding during the last Stage. Don't bother with the ilvl 496 gear from the Timeless Isle, as that isn't worth it, but anything in the 500's is fair game as far as I'm concerned. Raid items are pretty rare drops in the LFR, so upping the stats on what you have can only improve your play, which is good because you have a tough fight ahead of you. But I'm getting ahead of myself.
Tip 4: Track the achievement, not the quest
If you like keeping track of your progress on quests, you're going to be sorely disappointed with A Test of Valor. For some strange reason the quest designers wrote this text as a toggle rather than a cumulative track -- there's a 0/1 for receiving your 3000 points. Yes it's dumb, but luckily there is an achievement for this same quest, and tracking that will give you a progress of how many points you are earning.
Tip 5: Run heroic scenarios, or multi queue
Now let's turn our attention to the actual acquisition of your weekly 1000 Valor. The fastest way to earn these is through scenarios. If you can get a group together for heroic scenarios, you will earn about 120 each run. With only eight runs you will hit your weekly Valor cap, and in record time since scenarios only take about 20 minutes each.
Of course, perhaps you're antisocial like I am and don't want to spam Trade for a Her Scen group. In this case I recommend hitting raids. They take the longest, but you'll have access to LFR gear. As we progress through the Siege of Orgimmar, you'll want to get better gear to increase your raiding efficiency. Otherwise the fights will be too difficult for you to make much of a contribution to the raid. Granted, raids take time, and you only get 90 Valor for each raid. Yes there are enough raids to hit cap or near it, but sometimes they fall apart, leaving you with a hefty repair bill.
What I ended up doing is queuing for three different types of LFG runs -- a dungeon, a couple raids, and a scenario -- and running those back-to-back. Multi queuing like this means you don't have any wait time, since while you run your scenario your 5-man timer is still going, as are your raid timers. It's a very efficient way to play, and means you have a variety in your playtime, tricking your brain into forgetting you're in the middle of yet another grind.
Whatever way you choose to gather your Valor points, make sure you hit your cap each week. I'd recommend doing this early in the week, since more than one week I found myself remembering Monday night and stressing in a horrible raid that kept wiping, just needing to get my last 50 points. If you hit your cap early in the week it frees you up for playing other content, or even (blasphemy) other games.
Tip 6: Don't raid the last week
Yes, I know I told you to multi queue, raking in the points while efficiently jumping from scenario to dungeon to raid. I did this happily the last week, chewing through the raids like they were loot-filled candy -- a little hard on the molars but totally worth the pain. Unfortunately I then headed in the Stage 3 of the Questline, and then into Stage 4 realized that I needed those raids to progress in Chapter 3 of the Legendary Questline.
So here's my suggestion: The last week of your valor grind, hit your cap early, like Tuesday early if you can. Run dungeons and scenarios, do daily quests -- whatever you need to hit the cap. This will leave you the raids free for the next Chapter, and you'll shorten the stage after next by one week. I did not do this, so I have an extra week at least of the next grind, so I figured it was best to give you the option of saving yourself from making my mistake.
Stage 3: Whack-a-Warlord, MurlocKart and WoW Fortress 2
However you gather them, if you have kept up on your weekly cap you will hit the third week with 3000 Valor points in hand, and your reputation with The Black Prince spilling over into revered. Head back to Wrathion and receive your next set of quests. It's time to cut the opposition faction down, taking the head from the snake. You're also sent into the new battlegrounds to carry some flags, protect some carts, and win for mother Russia the Alliance/Horde.
Tip 1: Use Openraid
The Black Prince gives you a quest called A Change of Command, which requires you to fight the leader of the Krasarang forces on the opposing faction. I spammed trade for this quest, and received a bunch of replies (usually in sarcastic PST form) telling me in no uncertain terms this was soloable. What these people don't realize is that we are LFR players, wearing a combo of gear we've gotten from the raids and Timeless Isle 496s. Originally Warlord Bloodhilt was a raid boss, and yes, he was greatly nerfed, but that doesn't mean he is a pushover.
After doing some research on forums and comments, I stumbled on a simple solution: Openraid.us. This site allows players across servers to group up to accomplish the tougher goals in WoW -- arenas, rated battlegrounds, raiding, and yes, quests. Looking through the forum I found this post, where several people were posting their Battle.net IDs so they could get groups for the quest. Grouping with a mage from Open Raid and a hunter friend who also needed the quest, the fight was easy.
Tip 2: Protect the flag, stick with the cart
The second quest you'll receive in Stage 3 requires you to win matches in two new battlegrounds: Temple of Kotmogu and Silvershard Mines. You only have to win once, but how fast this can happen is really up to chance. I recommend getting into the battlegrounds early in the week (Tuesday or Wednesday) and in the evenings when more players are online. This gives you plenty of chances at wins. Chances are it will take a couple of games before you hit one that's a winner, mostly because these battleground are full of people (like me) who are just there to complete the quest. Just keep at it and you'll get your W.
With the Temple, the objective is to hold flags. It's a huge game of keepaway, and the longer you hold a flag the more points you earn. Depending on your class, you can try your hand at flag carrying, support of the flag carrier, or offensive sniping of other flag carriers on the opposing team. As a hunter I found I was incredibly good at annoying the other team, so I took the offensive.
Now in the mines your goal is to gather resources, and you do this by escorting mine carts from the center of the map to one of the locations around the map. I recommend working with your team to capture one cart at a time instead of trying to steal carts from the other faction. I had great success with escorting carts by my lonesome -- in fact I got an achievement for it. There are usually three active carts on the map at a time, meaning that the opposing team can't attack every cart at once. If you stick with your cart until the end, you'll get the maximum number of points for your team, and you'll have a good chance of completing the journey without being bothered by the other team -- particularly if you have a couple people on your team who keep them tied up in the middle.
If you have good fortune, you'll complete these two quests the first night you attempt them. Turn them in to Wrathion, listen to his monologue, and collect your reward. It's time to head into Chapter Three.
Stage 4: Bar Hopping for Fun and Profit
It's been a couple months since I last updated this guide, but that's largely because this particular stage was the hardest for me, and partly because life got in the way. In Chapter Three Wrathion is very interested in bringing down the Thunder King, but not for the reason you might expect. No, the Black Prince has decided he wants his power for himself, and to do that tasks you with creating a weapon of ultimate power.
Tip 1: Turn in Spirits of Harmony
If you've been questing around Pandaria for any length of time, changes are that you have plenty of these useless little blue orbs clogging up your inventory. Now is the time to put them to work for you, since you have 40 Trillium Bars to gather. head over to Vale of Eternal Blossoms and buy stacks of Black Trillium ore and White Trillium ore (1 Spirit for every 5 ore). You will need 80 Black Trillium Ore and 80 White Trillium Ore, which will cost you 32 Spirit of Harmony total.
At this point you can melt them yourself, which is what I did, or you can get a friend or guildie to melt them. Push comes to shove you can always pay for the service of smelting them into bars, or pay for the bars directly from the Auction House. You will have time to collect them yourself as well while you finish the second quest in this set, so if you want to head around and mine you can do that too. I like the Spirit of Harmony trick though because it allows you to quickly snap up a resource that takes hours to mine, and it costs nothing.
Tip 2: Flex your Might
The second part of Secrets of the Empire is to collect, you guessed it -- Secrets of the Empire. These tokens drop from all the bosses in Throne of Thunder and the firest eight bosses in Siege of Orgrimmar, much like all the other raid token quests we've done before on our journey toward cloak ownership. What's tricky about these is the fact that their drop rate is hideously low. There's no real tips I can provide here except that you want to make sure you empty out your lockouts, start this quest right after a reset, and make sure you kill every boss in both raids. If you're fortunate enough to have access to Flex or Normal level raids you'll have multiple chances each week to get these.
I relied on LFR again for my token grind, and it took me three weeks if I'm remembering correctly. It might have taken four, but as I said at the outset of this section, it's been a while. Here I might suggest that if you really want to speed things up and you don't have access to a Flex raid, hit up Openraid and see if there is a group running you can hop into. That way you have multiple chances to get your tokens, and access to better gear to boot (see what I did there?).
Tip 3: Do your Isle of Thunder Dailies
While you're collecting the required items for the first quest, the second quest is making you kill a ton of Mogu, Zandalari and saurok to earn exalted reputation with The Black Prince. This is good news, really, because there are a TON of those guys wandering around the Isle of Thunder, and pushing to exalted means this is the last time he's going to ask you to slaughter mass quantities of guys purely for his enjoyment (sanguine little bugger).
I suggest that while you kill thousands, pick up daily quests by your landing area and focus on that set of mobs. For the Horde the Mogu quests are closest (or the Zandalari second tier, but those guys aren't so easy as the Mogu), and the Alliance are closest to the saurok. For some people starting this quest chain at Patch 5.4 means that they also haven't bothered to grind through Isle of Thunder, so this is the perfect opportunity to gain some faction appropriate rep and a couple item upgrades to support your ilvl 496 gear from the Timeless Isle. It's going to take a couple weeks to get your Secrets of the Empire collected anyway, so I say take your time with the faction grind and do the Isle of Thunder dailies.
If you haven't already cleared Isle of Thunder, do all the dailies, as they will provide a good chunk of gold, and you'll be killing multiple groups of mobs that all count toward the quest. Those of you who already have cleared the content, I say take your time. You'll hit exalted right about the same time as getting your last raid tokens, and be all set for the next great adventure.
Once you have collected your 40 Trillium Bars and have your 20 Secrets of the Empire (psst Vader is totally your father), then head back to Wrathion and toss them at his feet. Just be careful not to hit Anduin's leg -- he's injured.
Stage 5: Do the Anvil Shake
Tip 4: Bring Plenty of Speed Potions, Get ready to Kite
The next quest sends you into The Thunder Forge to create an epic weapon. This is a single player scenario, and it's far from easy. I probably died in here about 15 times before I did enough forums post reading to find a solution. The scenario itself is divided into two sections, and luckily there is a checkpoint between the two because while the first section is pretty straightforward, once you hit the last stage things all go to the Nether in a Handbasket.
The best method for getting this stage completed is to pop all the anvils save one at the beginning, careful that he is in sight of them or the LoS issue with the center column will keep him from getting damaged. After this beat on the Sha profusely, carefull not to pull too much aggro from the Celestial Defender. Occasionally the Defender will get banished, at which point you will need to kit the Sha around the room until the Defender is available again, and then drag him back to the Defender and dump aggro. After he's gotten aggro again, go ahead and use the last anvil. The Defender might become critically injured during the fight unless you heal him or have him stand in the green healy beam (which is tougher and less silly than it sounds). I ended up losing him for a good portion of the fight, which meant a lot of running from death.
The Sha's hit points will be very low at this point, but he's still tough. It's about this time that the Spear shows up hanging vertically in front of Wrathion's anvil. Clicking it will cause you to channel for a bit, so try your best to not be taking direct damage from the Sha or little baddies during this point. When channeling completes use the action button to kill the Sha and take a deep breath for the first time in a while
Tip 5: Mount up by the Spirit Healer
You can mount up where you are rezzed even though you are inside, so use your repair mounts often between attempts. For those of us who don't have repair mounts, at bot at the top of the stairs works for Engineers. The rest have to rely on potions, flasks, food, and luck.
When you succeed you will finish your quest there in the Thunder Forge, and Wrathion will send you outside to face an even more annoying threat: Nalak.
Stage 6: Dancing with the Dragon
The Lance is now forged, but it doesn't have any power. To charge it up you need to find something big and stormy to toss it at. Luckily there's a rare-yet-always-there dragon floating outside the Throne of Thunder. Head out there and toss the lance at him and charge it. Sounds simple, right? Wrong. This is where I got hung up for a couple months.
Tip 1: Don't do this alone
The comments on this quest will tell you that this is "totally soloable," and maybe if you're a Death Knight with ilvl 506 gear it is. But if you are a DK with that gear, you probably have already done this quest chain, so sit down and let the rest of us talk. The trouble here is that you're taking on a world boss, and one that not only does melee damage, but who also drops lightning storms on random players. If you are trying to solo this, that random player is always you, and you'll be hit with periodic lightning damage until you die. Then you'll have to run back and try again.
Theoretically you could kite Nalak to the NPCs standing at the back of Nalak's playpen, but then you are still open to getting hit with the lightning storm and unless you're a healer (which I am not) you won't be able to survive it. There are a couple of methods online that describe how you can toss the lance at Nalak, pop a speed potion, and book it to the top of the stairs, at which point the elemental you need to kite is still alive but Nalak despawns. After weeks of trying this method on and off every day, I can tell you that while it might work for some it did NOT work for me. Frustrated I tried to hit up Openraid, but found no interest. I advertized in Trade chat, trying to build a raid group to take him down, but he's such a stale boss that no one was interested. I did find someone who would be willing to tank the encounter for me for 5000 gold, and that hung me up as I waffled on whether or not it was worth spending my hard earned gold on one single quest.
I was about to give in and pay for completion when my husband stepped up to tank for me, and he brought along a friend to heal. It still took a couple of tries, but between the three of us there were at least a couple targets for the lightning storm so when I tossed my lance, I was able to kite around until the elemental died, just in time since the other two players had been fried to a crisp by this time.
I am pretty peaved a quest like this is still in the game, considering that no one is fighting Nalak anymore. If it weren't for an insane amount of gold, or an active guild, or the luck of having three people with crap gear who all knew how to play, I would never have been able to finish the quest. Considering how few players there are in the Isle of Thunder content (read: only those doing this quest chain) I really think they should remove this step.
Okay, now that my rant is over, head back to Wrathion in the Veiled Stair, give him his little weapon and he'll give you a Legendary meta gem and the task to finally take down the Thunder King once and for all raid until your eyes bleed.
Stage 7: Stone Grinding
The next quest you are given seems a simple enough one: Do a little raiding, collect some Titan Runestones, and learn about the origins of the Mogu. On the surface this is a basic enough task. In reality it is nothing more than a twisted mindgame dragging us down into our own personal RNG hellscape. You have to collect 12 runestones, and while this doesn't seem like a bad thing on the surface, their drop rate is incredibly low. If anyone is able to run these raids in multiple difficulties, I'd love to know if you get extra chances for token drops. As it is, this stage took me three weeks to complete, and only two of the gear drops I recevied from killing 14 bosses a week were actually upgrades.
Tip 1: Run the Right Raids
The quest tells you to head into the Halls of Flesh Shaping and Pinnacle of Storms to collect your tokens, but in fact they also drop in Vale of Eternal Sorrows and Halls of Retribution.
Tip 2: Make Sure to Kill Lei Shen and Sha of Pride
These two bosses guarantee a Titan Runestone drop (as does Ra-Den, but I've never fought him as I only raid on LFR). There's a caviat though:
Tip 3: When you're close to done, skip Lei Shen
If you're close to getting all 12 runestones but need just a few more, skip Lei Shen until you absolutely have to. The next quest requires you to kill him, so if you say, kill him Tuesday right after reset (as I just did) you will have to wait an entire week in order to get that next step completed. And you will seethe, and mutter, and say not-nice things about raid lockouts. If you run out of opportunities to get your Runestones and still need another, I say go ahead and kill him. You will still be waiting that week, but at least you can do it knowingly.
Turn in your Titan Runestone's to the ol' Princie, and he'll give you the quest to kill Lei Shen. Don't think too hard on this, considering this is the third time he's asked you specifically to kill Lei Shen. The continuity paradox will make your brain melt, and then you'll never get your Legendary Cloak.
Stage 8: Eat Your Heart Out
The next stage in the Legendary Cloak questline is pretty simple, and I really don't have a tip for you. You finally get to kill the Thunder King (for reals this time guise) and doing so will get you to the end of Chapter III and an achievement. Queue up for Pinnacle of Storms on the LFR. If you were clever enough to leave Lei Shen up from the last set of quests, you can get this step done right quick and head straight into Chapter IV leaving the Throne of Thunder, thankfully, behind you for good.
Stage 9: A Challenge Accepted and a Cloak Obtained
Here we are, we've reached the ultimate quest in this long journey that started all those months ago. When I realized I had gotten to this point, I was shocked. I had spent so many weeks logging into WoW with a mission, a mission to continue this epic story and one day, if I was persistent enough, come out with a cloak to show for my efforts. Well, for me, yesterday was that day.
The final task Wrathion has for you is both simple and incredibly difficult: Gain the favor of the four August Celestials of Pandaria, and complete one of their challenges. Once you pass muster on this though, the Legendary Cloak of Legend will be yours.
Tip 1: Do Your Research
There are four types of challenges available from the Celestials, one for each of the roles classes inhabit in combat: Nuizhao holds a challenge for tanks, Yu'lon challenges ranged DPS, Xuen challenges melee DPS, and Chi-Ji challenges the healers. Because everyone plays different specs I can't give you specific information about your current spec. So here is where following the WoWHead guide (or whichever you've been following) really comes in handy. The comments are particularly useful, and they gave me information about the Yu'lon fight that was pretty helpful.
Tip 2: Plan your Route Accordingly
This is the last quest, so you want to get it done as quickly as possible. With that in mind, once you've decided which challenge you're going to undertake, plan your flight route to end at that particular Temple. This will save you unneccessary backtracking in order to start your challenge. For ranged DPS heading to take on Yu'lon's challenge, I would, for instance, suggest starting at the Temple of the White Tiger and following a counterclockwise route that takes you from there to visit Nuizhao and then down to Krasarang for a chat with a crane. That way you end at the Temple of the Jade Serpent ready to face your challenge with minimum travel time taken.
Tip 3: Practice Makes Perfect
I was having a bear of a time (I play a Pandaren, so pun intended) with the Yu'lon challenge, until two things happened. One was I found a great piece of advice on the comments on the Celestial Blessings quest page: Turn it into a grind. The minute I failed I ran and hit the gong again, not waiting between attempts. This allowed me to settle into the good ol' LFR token grind mindset I'd been using all these months to keep me from going mad when the last Titan Runestone refused to drop.
The second thing that happened was that I got frustrated. I got so frustrated with getting hit by Inferno that I retreated just under Yu'lon's butt. I figured I would just sit there and take a moment to breathe and kill adds. This provided a couple of benefits to me: Firstly, the adds were dying in the same place, so I knew where they would respawn so I could place my slowing traps accordingly. Second, stepping out of the range of Inferno allowed me to heal using Spirit Bond so I spent most of the fight at full health. I realize that this was a very Hunter-y advantage, but it's ultimately what allowed me to win. I quickly fell into a rhythm: Mirror Images would spawn, as would the spikey balls of death, and I would toss a slowing trap down (I just realized I completely forgot about Binding Trap, which I took specifically for this fight. Gah!) then launch a fire and a snake trap at the nearest Mirror Images once they were done with their Inferno cast. Then I would go back up to my stage, kill the adds and heal up. At this point my pet usually had ferretted out Wrathion. But...
Tip 4: Look Closely
If you look closely you can actually see that the real Wrathion isn't washed out like his Mirror Images are. This mean you can hit him directly (if he's in range of course) or send a pet after him or something and shorten that phase. Then he'll come after you, and since you're upstairs, he'll have to travel back down to his starting point to summon his next set of Mirror Images, which gives you extra time to whittle him down.
I fully realize that these tips probably won't work for the other three challenges, but it's the best I can do with the resources available to me.
One you finish your challenge head to Mason's Folly and marvel at the confusing turn this quest chain has taken. Grab the cloak that is best for your spec, and enjoy!

Post Script: There is a last set to this quest line that finishes the story, bringing you through the Timeless Isle and right into Siege of Orgrimmar. This set of quests allow you to power up your cape with bonuses according to your chosen spec and Celestial I assume. I will start them this week. Leave a note down in the comments if you think it would be beneficial if I created a small guide for that section of the questline. Thanks for taking this journey with me. Who knew back in September it would take until February 14th for me to get my actual cloak.
Waiting for the rest of this. Me and Vicki don't have ours yet and want to make sure we get it.

